A few basic tips
The Learning Curve
in Model Ship Construction
Taking up a new hobby is likened to starting a new job in any career. One doesn't know what to expect. We rely on our own judgement and previous knowledge accumulated over the years. When there is no formal training, we learn from the experience of others, from reading instruction books on the subject, from examining plans and photographs, from asking questions and generally researching so that we can produce the best results possible within our own abilities.
With that in mind, I felt it may be useful to document a number of hopefully useful tips that I've been either taught or that have surfaced as I came across difficulties. These are documented in no particular order and will be added to or elaborated on as time progresses and hidden memories restored!
Note: Three years have passed since I updated this section. For this I apologise but have recently been reminded by an article in the Sydney Ship Modellers bi-monthly magazine "Chatterbox" that tips and experiences in modelling are very much welcomed in this wonderful magazine. I shall now attempt to add to the articles below, as I had previously undertaken to do.
Updated February 3rd 2017
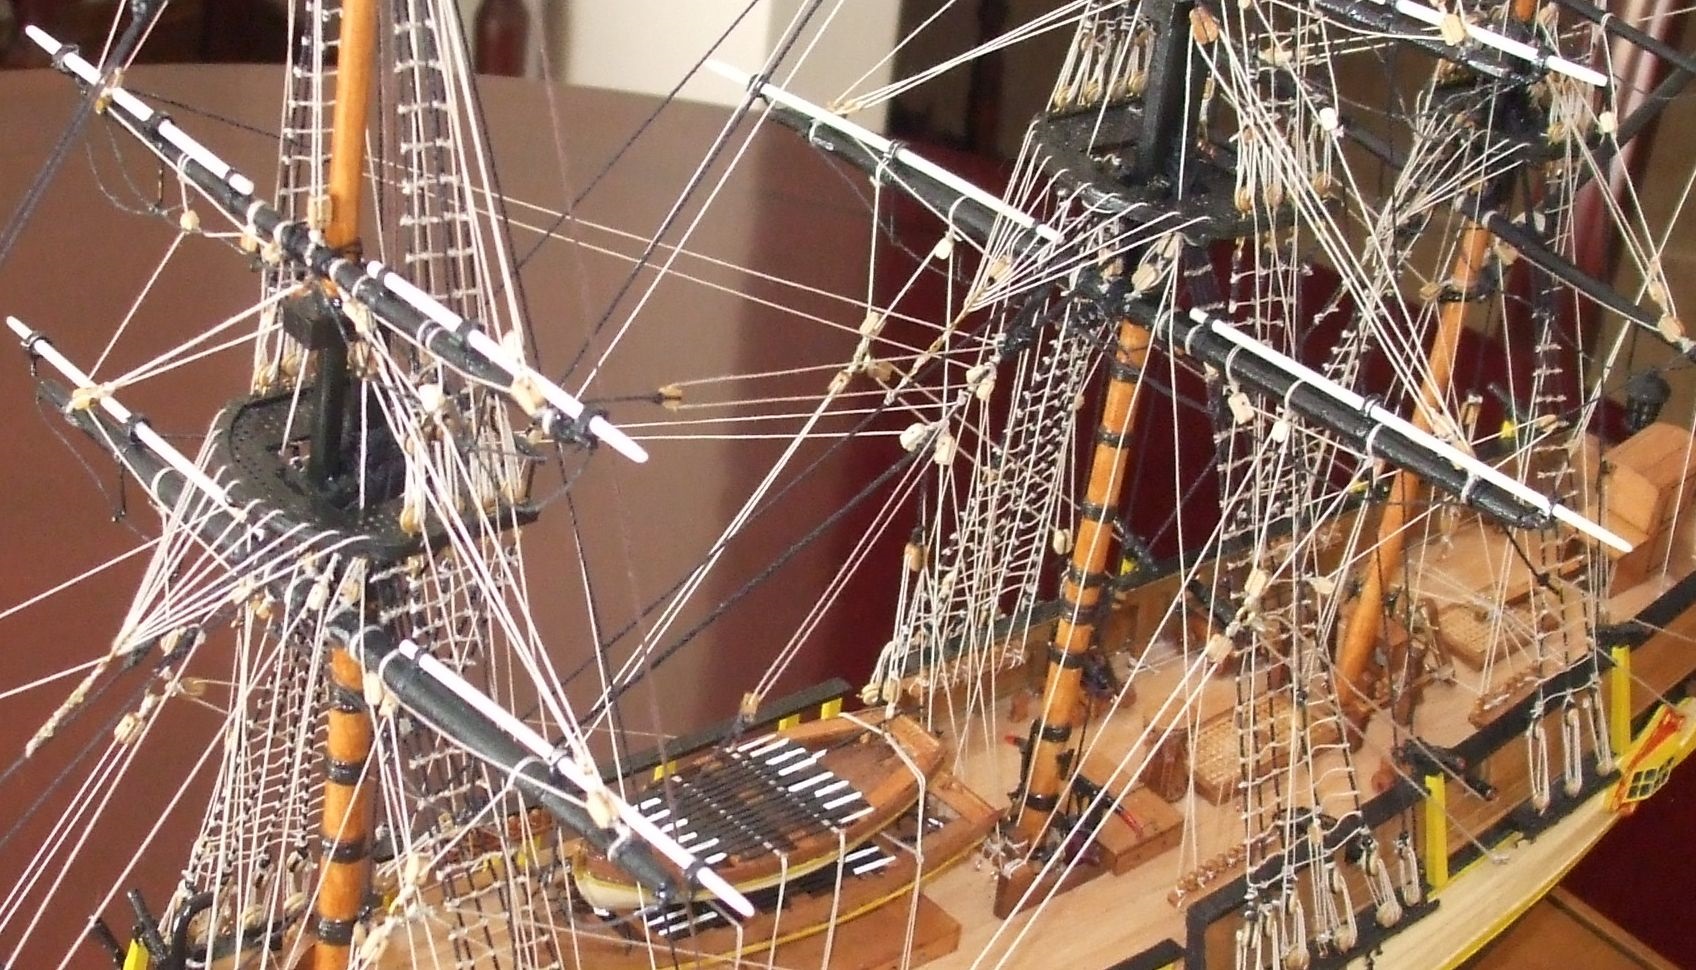
Example of crowsfeet rigging in HMAV Bounty 2 completed in 2015. see more photos under this name.
Some ideas to help with Rigging
Knots and things
Many non-maritime people have difficuty with knots. Fortunately I had the fortune of having a very fine teacher in Bosun Kuhlmann at the School of Navigation, Warsash, Southampton in 1950. He had the knack of passing on his knowledge of knotting and splicing in a manner far more instructive than trying to follow and practice from illustrations in books. Not all would have the advantage that I had and may have to rely on such illustrations. My message is really that practicing a number of simple knots used in the rigging process will be a great advantage before actual modelling is commenced. Some of the most commonly used knots in the rigging of models are:-
The Reef Knot, The Clove Hitch, The Figure of Eight Knot, The Round Turn and Two Half Hitches, the sheet bend and the Rolling Hitch. A bowline on the bight is one I use occasionally but needs a bit of practice especially when using fine cottons. (I'll add to these as time goes by!)
'Practice makes perfect' certainly applies with knots and splices. Similarly, an interesting but more advanced art is learning to plait, braid or weave sennits. Mainly used for decorative purposes, they are an art practiced in their spare time by seafarers the world over and indeed by landsmen alike. They do have useful purposes as well. The most common is in bell ropes, lanyards and sashcords. Nowadays many are machine made but a personally made sennit is always going to be admired. Rather than attempting to explain their construction - and there are virtually hundreds of variations - I recommend the purchase of a book written by an American sailor "The Marlin Spike Sailor" by Hervey Garrett Smith which covers a wide area of roping, splicing, knotting and sennits. It should be available at most yacht centres, ship chandlers or boat suppliers. Otherwise try the internet for on-line purchases.
Learning simple whipping techniques is strongly recommended. Most models require that the standing rigging, ie. the ends of the stays and the shrouds are passed around a mast and the end whipped back on itself to form a secure bight. On small models, this is very awkward so I make do with a series of overhand knots with very fine cotton which look almost as neat. Browse the internet and there are a number of sites that show the techniques of whipping.
Reeving blocks with fine cottons, the ends of which rarely stay straight, can be helped by taking a little aquadhere between the thumb and forefinger and sliding the fingers along so as to lightly glue the ends. Allow this to harden and you'll find it easier to access the holes in the blocks. When dealing with extremely small blocks and equally small holes, this process becomes an essential!
12.4.17 During the commencement of rigging the bowsprite of my latest model, the "Aurora" I was reminded of the importance of being liberal when cutting lengths of the rigging cotton. Many kits have either lists of the cottons required for each job and others show the lengths in a table on the plans. Whichever case is in question, you will find the recommended lengths invariably refer to the span required between points. It is unlikely they include an allowance for secure knotting. I strongly urge the modeller to exceed the measure by up to 20%. It is much easier then to make the loops and thread the cottons than struggle with a short end!! Don't worry about the waste - cotton is about the cheapest item to purchase.
(More info as as it comes to mind!)
CROWSFEET RIGGING
19.1.2017
It was recently brought to my attention in an article appealing for information about crowsfoot(or feet) rigging and how it was done. Having been faced with the same position a few years ago, I sought info. from the internet.
My first attempt was with the "Bomb Ketch" by Amati which needed the additional strengthening forrard to counter the recoil effects of the mortars on the foredeck. This was not as complex as my second attempt on the "Bounty" 1:64 by Caldercraft in 2015.
This example of the finished product is seen in the above attached photograph of the Bounty which has the system on all three masts.
Below is seen a diagram of the way in which the system is reeved

Crowsfeet rigging diagram (courtesy of the internet)
The diagram is self explanatory . Clearly the number of holes at the mast table will vary with each mast size and model as will the holes in the lower end attachment (the euphroe block)to the brace. Just follow the direction of the arrows, starting from the middle of the attachment. The fittings will normally be supplied in the kits. Mine certainly were.

Description of bevelling (From an article by Modellers Shipyard 1998)
Planking - A few personal points of view
The First Planking
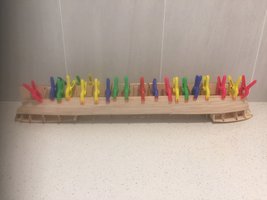
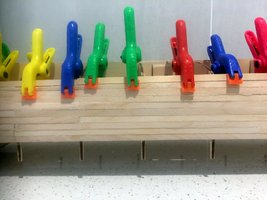
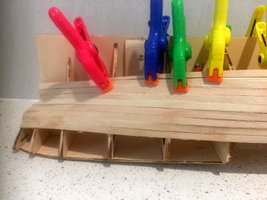
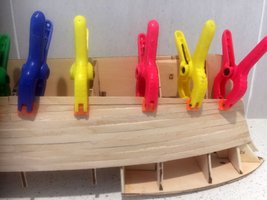
Most of the models I have made are double planked. The first planking is generally wider, using a softer timber like Limewood or Ramin and is relatively easy to work with, although sometimes resistant to major bending. Careful use of a steam iron has proved to be my best technique for bending, but not everyone agrees. In addition, although preferable to make the neatest job of the first planking, it is not as crucual to to make it as near perfect as possible - as it is with the second planking.
Should you decide to try the steam iron system, I use 2x300x300 tiles (you can get reject tiles from any tile retailer, free or next to nothing) which provide a flat, hard and even surface which is waterproof. The steam from the iron will dampen your wooden table/workbench whereas on the tiles it provides the dampness for the bending process which can be wiped up with a cloth on completion.
Pinning and the Second Planking
More often than not, the second planking is narrower than the first and a harder wood like walnut is the chosen timber by most kit makers. Although this timber shows up well as a finished article, it is clearly a harder timber to fashion in the cutting process as it does split more readily than the softer woods and takes less kindly to the use of the brass pins to secure to the first planking. It is also is harder to taper and extreme care needs to be taken when using the pinning method at the ends. Hence most kit makers suggest pinning should be avoided and a moderately quick drying adhesive used. That, I find, is not always possible when taking the necessary care to ensure the correct positioning of the planks. Applying the adhesive in short sections is also difficult to manage. So, experiment and use the method best suited to personal choice. I find it better to avoid using the short pins provided in the kits and prefer the longer pins known as "Sequin & Bead Pins" 16x35 mms, yellow brassed shirt, which can be purchased at any large haberdashery/craft shop. They are longer and easier to work with. It is not necessary to drive the pins in more than half way - with the exception of those you feel need to be left in the plank to ensure more durable adhesion. This generally occurs in the bow and stern ends of the planks where fairly severe pending is necessary.
Still on the subject of planking, most instructions advise the order of planking to be from a particular position from the top of the hull down to the keel. I found an article a few years ago that suggested, after positioning the top two or three plankings, a plank should be positioned halfway/middle of the hull and then work both ways down and up from the keel. Having practised both methods, I found the latter method more successful. It allows for the final tapering to be a minimal exercise just below the mid placed plank.
The last matter concerns bevelling. This is always a challenge - more so with the vessels pre 19th century where the hull shapes are more 'bulbous' and achieving the correct angles to minimise open joints between planks. The answer is 'try, try and try again!
15.1.2017 Have been able to start the first planking on the "Aurora" recently and apart from finding the instructions and coloured photographs included in the Occre kit most informative, I am finding how important bevelling is in this model The ramin used is 4mmx2mm and in order to obtain a reasonable 'smooth' join - bevelling is essential. This seems to apply mainly when such sized timber is used on a smaller dimension model. The question is - how much of an angle do I sand off? That can only be answered by trial and error or maybe I should say - good judgement!
COPPER PLATING
In order to view the results of coppering the 'below waterline' hull, have a look at the HMAV Bounty 1-64 model on this site where a few useful tips on the laying of the plates are included in the text below the first photograph.
Helpful hints for Ratlines in the Upper Reaches
Helpful hints for ratlines in the Upper Reaches
(Especially for those in advancing years whereby sight and steady hands are less reliable!)
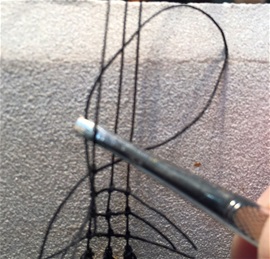
When wrestling with 0.25 cotton on shrouds that get closer with height, such as in the upper reaches of our respective models, and in particular when black cotton is used for both shrouds and ratlines, we need a little help!
After a few experiments, it was found that lodging a folded section of white sandpaper between the shrouds and the mast helped distinguish the ratlines more clearly. Try then the following steps:-
1. Cut a generous amount of cotton for the ratline and run it between the thumb and forefinger to straighten it. It will then be more easy to feed around the shrouds.
2. Select a pair of tweezers that have the best fine and flat ends to grip the cotton.
3. Hold the cotton in the tweezers with around 20mms protruding.
4. Normally one starts at the left hand shroud by feeding the cotton from left to right behind the shroud - see Picture- first loop on LH shroud - sandpaper in place
The first clove hitch

5. Complete the clove hitch finishing with the end used on the tweezers facing the left and the long end to the right being a generous
length to complete knotting the remaining two shrouds See adjacent picture.
PIC 2 Second loop of clove hitch
6. As the row is being tied, try not to tighten them too tight but retain the natural distancing between the shrouds. Then trim the cotton at each end such that a grip is still available should adjustment be required at a later stage. When about 5 to 6 rows have been completed, it is a good time to tidy up the settings so the recommended distances are correct and in alignment. Then tear drop glue the knots on each ratline and allow to dry before tackling the remainder. Repeat this process until the job is complete. See Pics 3 .& 4 Pic 4
Ends trimmed with enough left

6. As the row is being tied, try not to tighten them too tight but retain the natural distancing between the shrouds. Then trim the cotton at each end such that a grip is still available should adjustment be required at a later stage. When about 5 to 6 rows have been completed, it is a good time to tidy up the settings so the recommended distances are correct and in alignment. Then tear drop glue the knots on each ratline and allow to dry before tackling the remainder. Repeat this process until the job is complete. See Pics 3 and 4
Job complete

Pic 4 Ends trimmed off and tear drop gluing almost dry.
Cotton trimmed with sufficient left for final adjustment.
Hoping this may help some of us burdened with limitations of age!!
Good luck and keep trying!
Michael B 17/6/21
Question: Why sandpapaer? Ans: It stays in place better than smooth paper!