Classic Ship Models 3
A Historical Account
A Historical Account
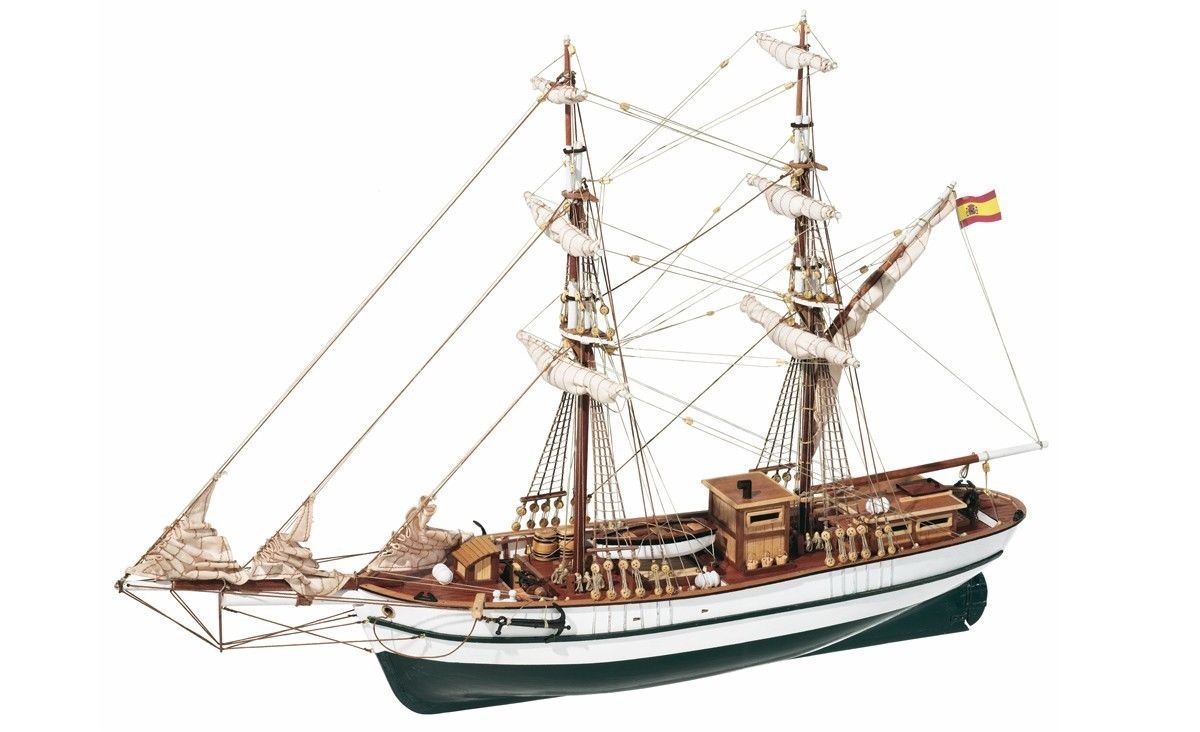
"Aurora" A Brigantine
of 1863
Although described by the kit maker Occre as being a Spanish Brig, research conducted by Tom Wolf, a wonderful member of the Sydney Model Shipbuilders Club with a wealth of knowledge, has proved the vessel was built in Nova Scotia. I am indebted to Tom for all this information. There are, however, other vessels of varying types which have been similarly named, from different shipyards world wide and in different times. We believe this is the one on which the Occre model is based although it may have been to Spanish plans.
Occre advertise the fact that " Brigantines like the Aurora were the backbone
of the North American trade during the 19th century. Usually less than 100 ft long and manned by six to eight sailors, they were built quickly and at relatively low cost. They were rigged with square sails on the foremast and triangular sails on the
after mast for a practical combination of speed and manoeuvrability. Hundreds of brigantines like the Aurora were built in Nova Scotia, New Brunswick and New England from the 1830's until the 1920's. These ships transported lumber and salted cod to the Caribbean
in exchange for sugar and rum". Note: Canada was not created as a country until 1870, so she would have flown a British flag!
This brigantine "Aurora" (107.6 ft x 27 ft x 12.7 ft) was actually built in La Have (Bridgewater), Nova Scotia in 1863, and was acquired by the Bridgewater Presbyterian Church in 1866 to transport the Rev. John Morton's voyages to Trinidad to found a mission. She was registered(#42515 Nova Scotia Registry of Shipping, 1866) in the nearby lively port of Lunenburg. She was destryed by fire in New York Harbour on November 29th 1868, less than a year after Rev.John Morton's eventful and momentous passage.
In 1866, Rev. John Morton, a young Presbyterian minister from the small town of Bridgewater, Nova Scotia, who was convalescing from a recent illness, travelled to Trinidad - which was then a British colony of the West Indies - on the "Aurora". At that time, she was described as a private trade schooner. When Morton returned, he reported his deep concerns about the social conditions of the population of 25.000 Indians on the plantations. Morton then was given approval from the maritime synod of the Presbyterian Church to found a mission in Trindad.
The Indians were indentured workers replacing slaves in the plantations. In 1833, slavery was abolished in the British Empire and proclaimed in 1838 in Trinidad. The British owned sugar plantations in the Caribbean were facing ruin so, in 1845, indentured labourers form India started arriving. By 1868, the numbers had grown to over 30,000 and in the period 1845-1917, they grew to 120,000.
Despite the relatively short voyage to Trindad, transoceanic sailing in the 1800's was still risky. The craft were small, sometimes overloaded and weather forecasting was limited to a barometer and the well known rhyme abour red skies in the morning. In 1867 on his second voyage on the "Aurora", Dr Morton with his wife and 3 year old daughter, found it be a perilous one. The vessel ran into a hurricane en-route; the masts were cut away and all on board had consigned themselves to the grace of the Almighty on more than one occassion before their eventual arrival. Other ships out of Bridgewater which left at the same time and for the same destination were either lost with all hands or barely limped to their destination.
Having committed to his mission in Trindad in 1868, Dr Morton worked there until the end of his life on August 4 , 1911.
Stages of construction

For the interest of model makers, below are shown some photos of the various stages of construction
This section shows the completion of the hull and most of the plankings.
The texts and photos are taken during the construction of the model which was commenced in 2016 but was severely affected by our house move and subsequent months of alterations, extensions and then health problems such that progress only resumed at the end of the year.
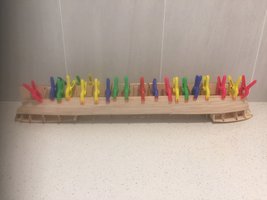
The above photo shows the second planking nearing completion. The view shows the decking and supporting staunchions on the internal bulwarks. The inner planking required consideable bevelling as the timber was 4mms thick. The outer planking is of 0.6 x 5mms and required no bevelling. AS the external planking was so thin, it had to be applied with a quick drying adhesive and without pinning which would have caused splitting.

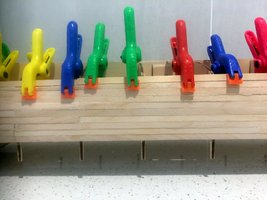
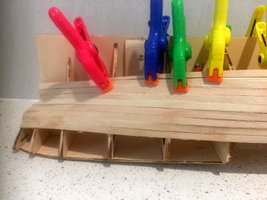
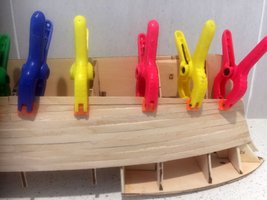
This shows the tools I use when planking and the second planking being laid upwards from the keel and downwards from the bulwarks.
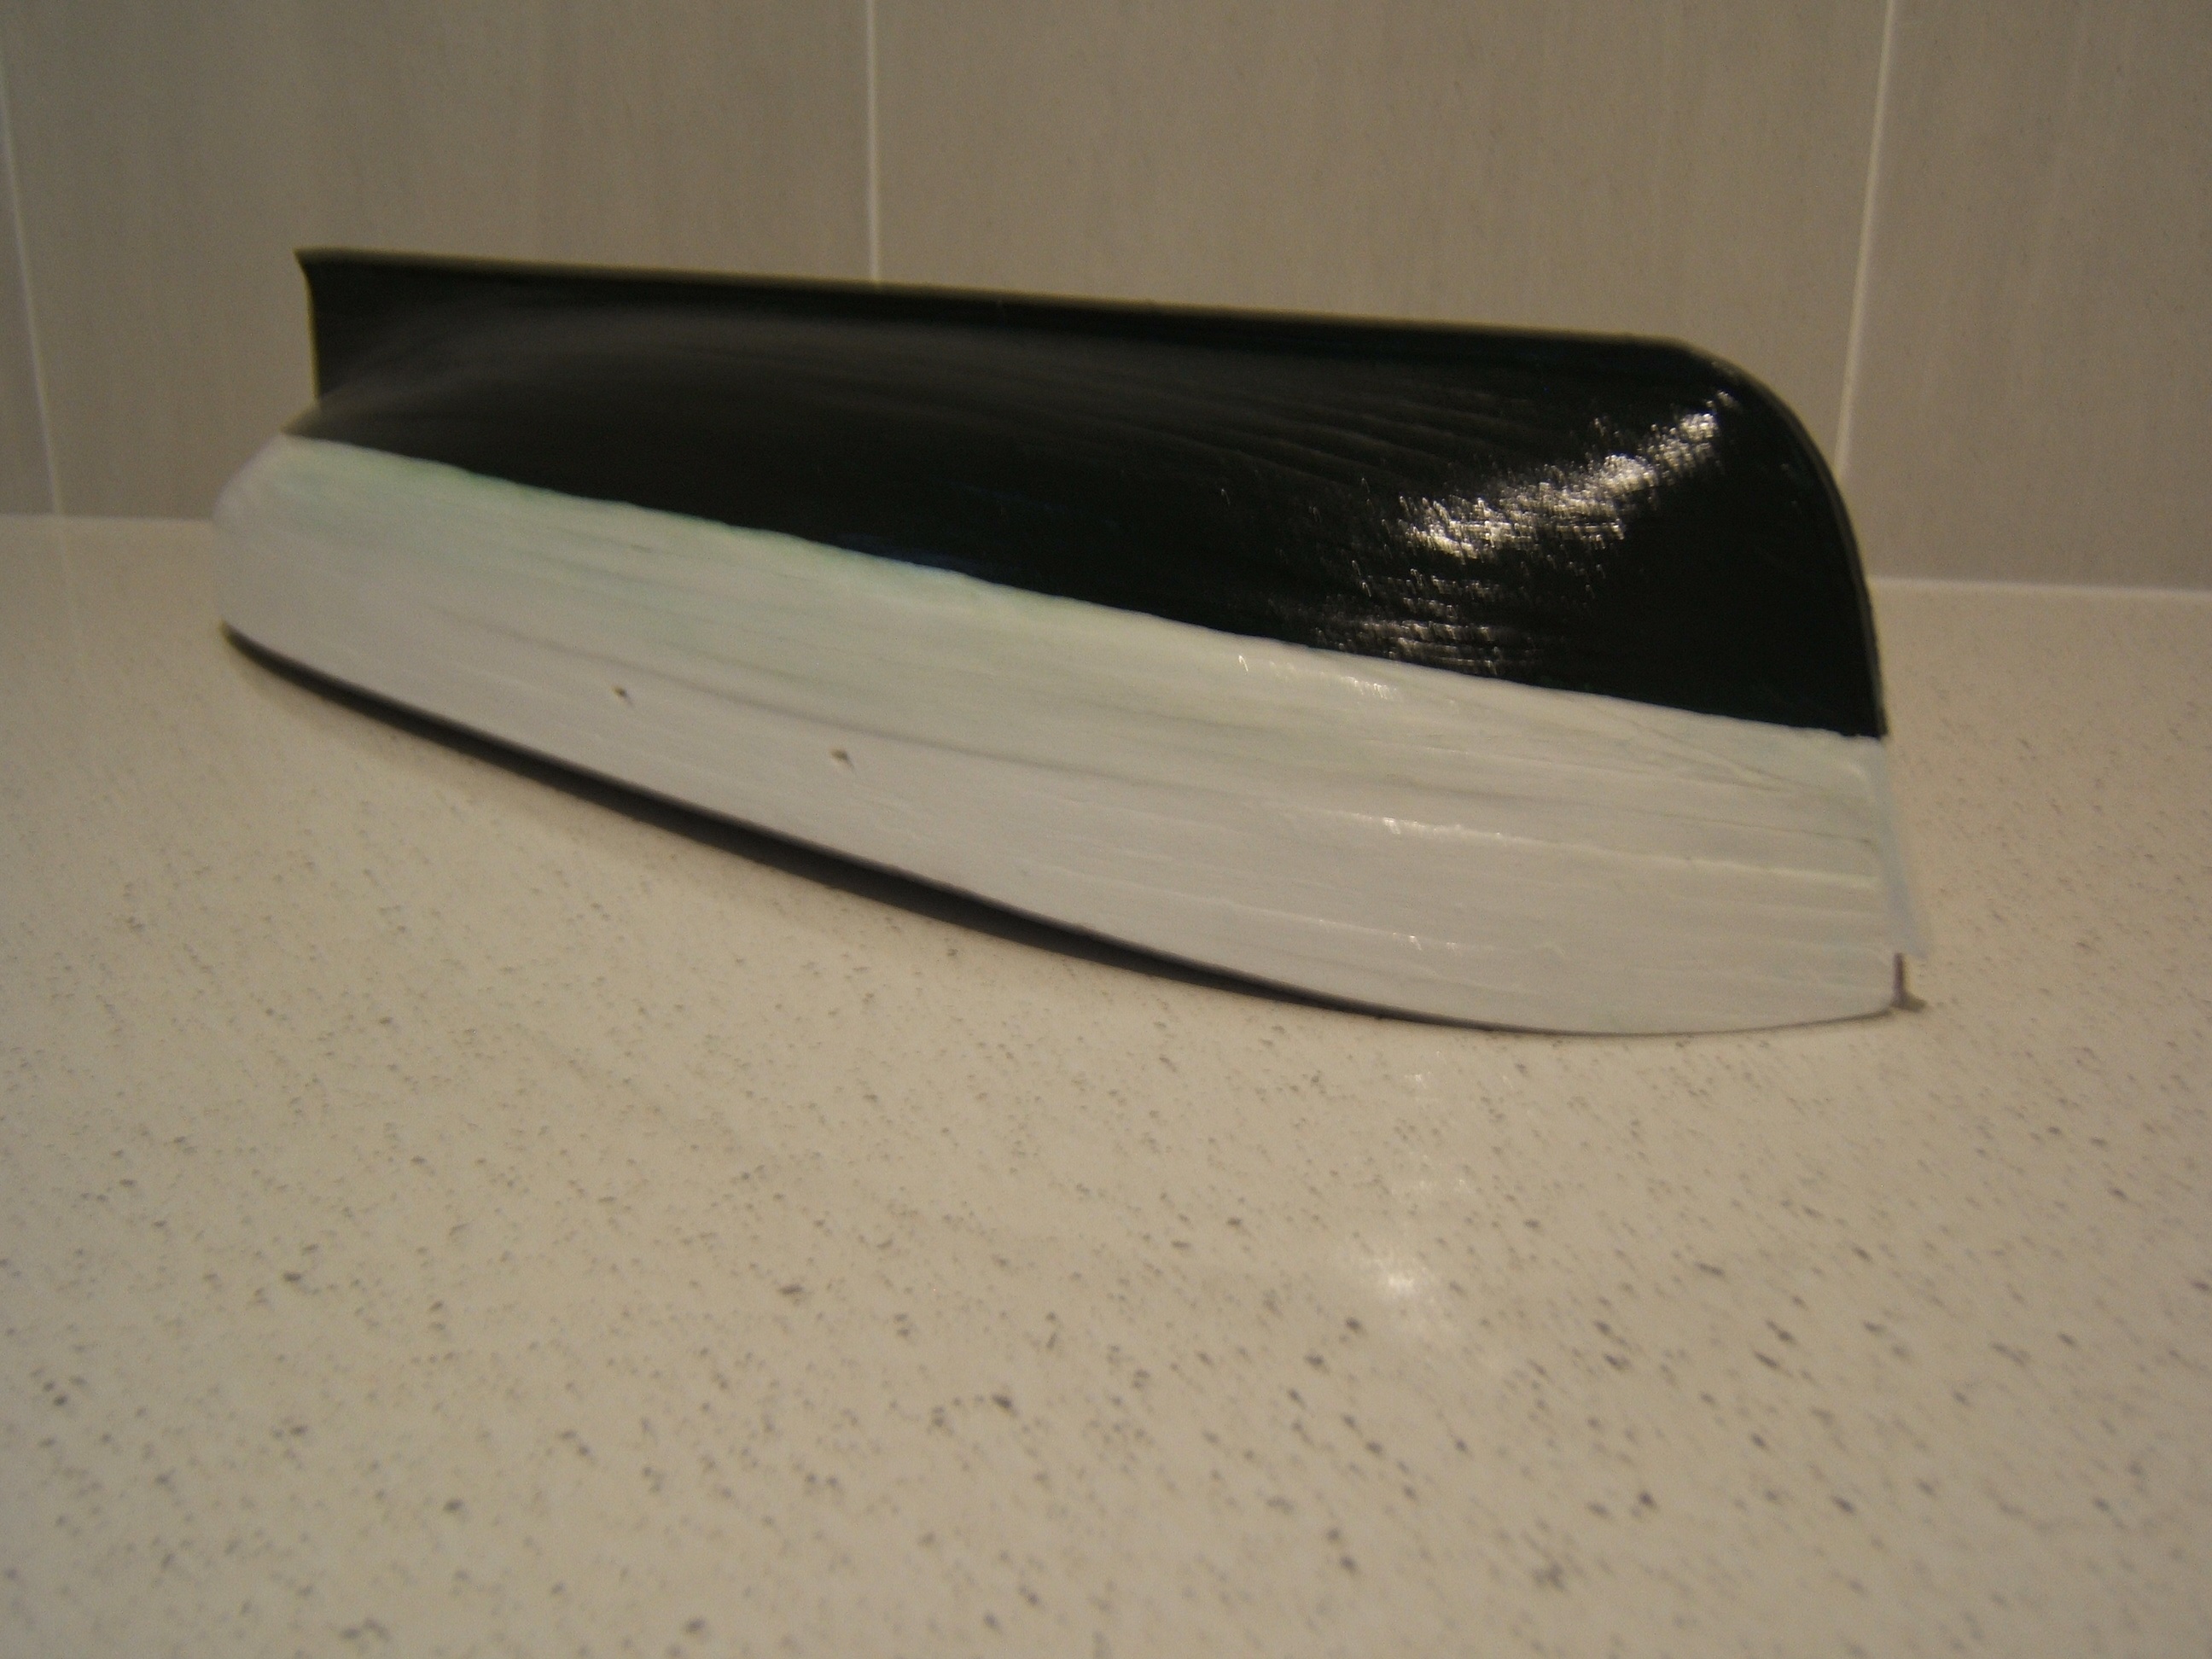
Here we see the hull now painted in the traditional colours. Below the waterline it is in Hookers Green and the above is in Titanium white - both colours sealed with water based cabothane clear. (The green tends to look black but it is actually a deep green.)
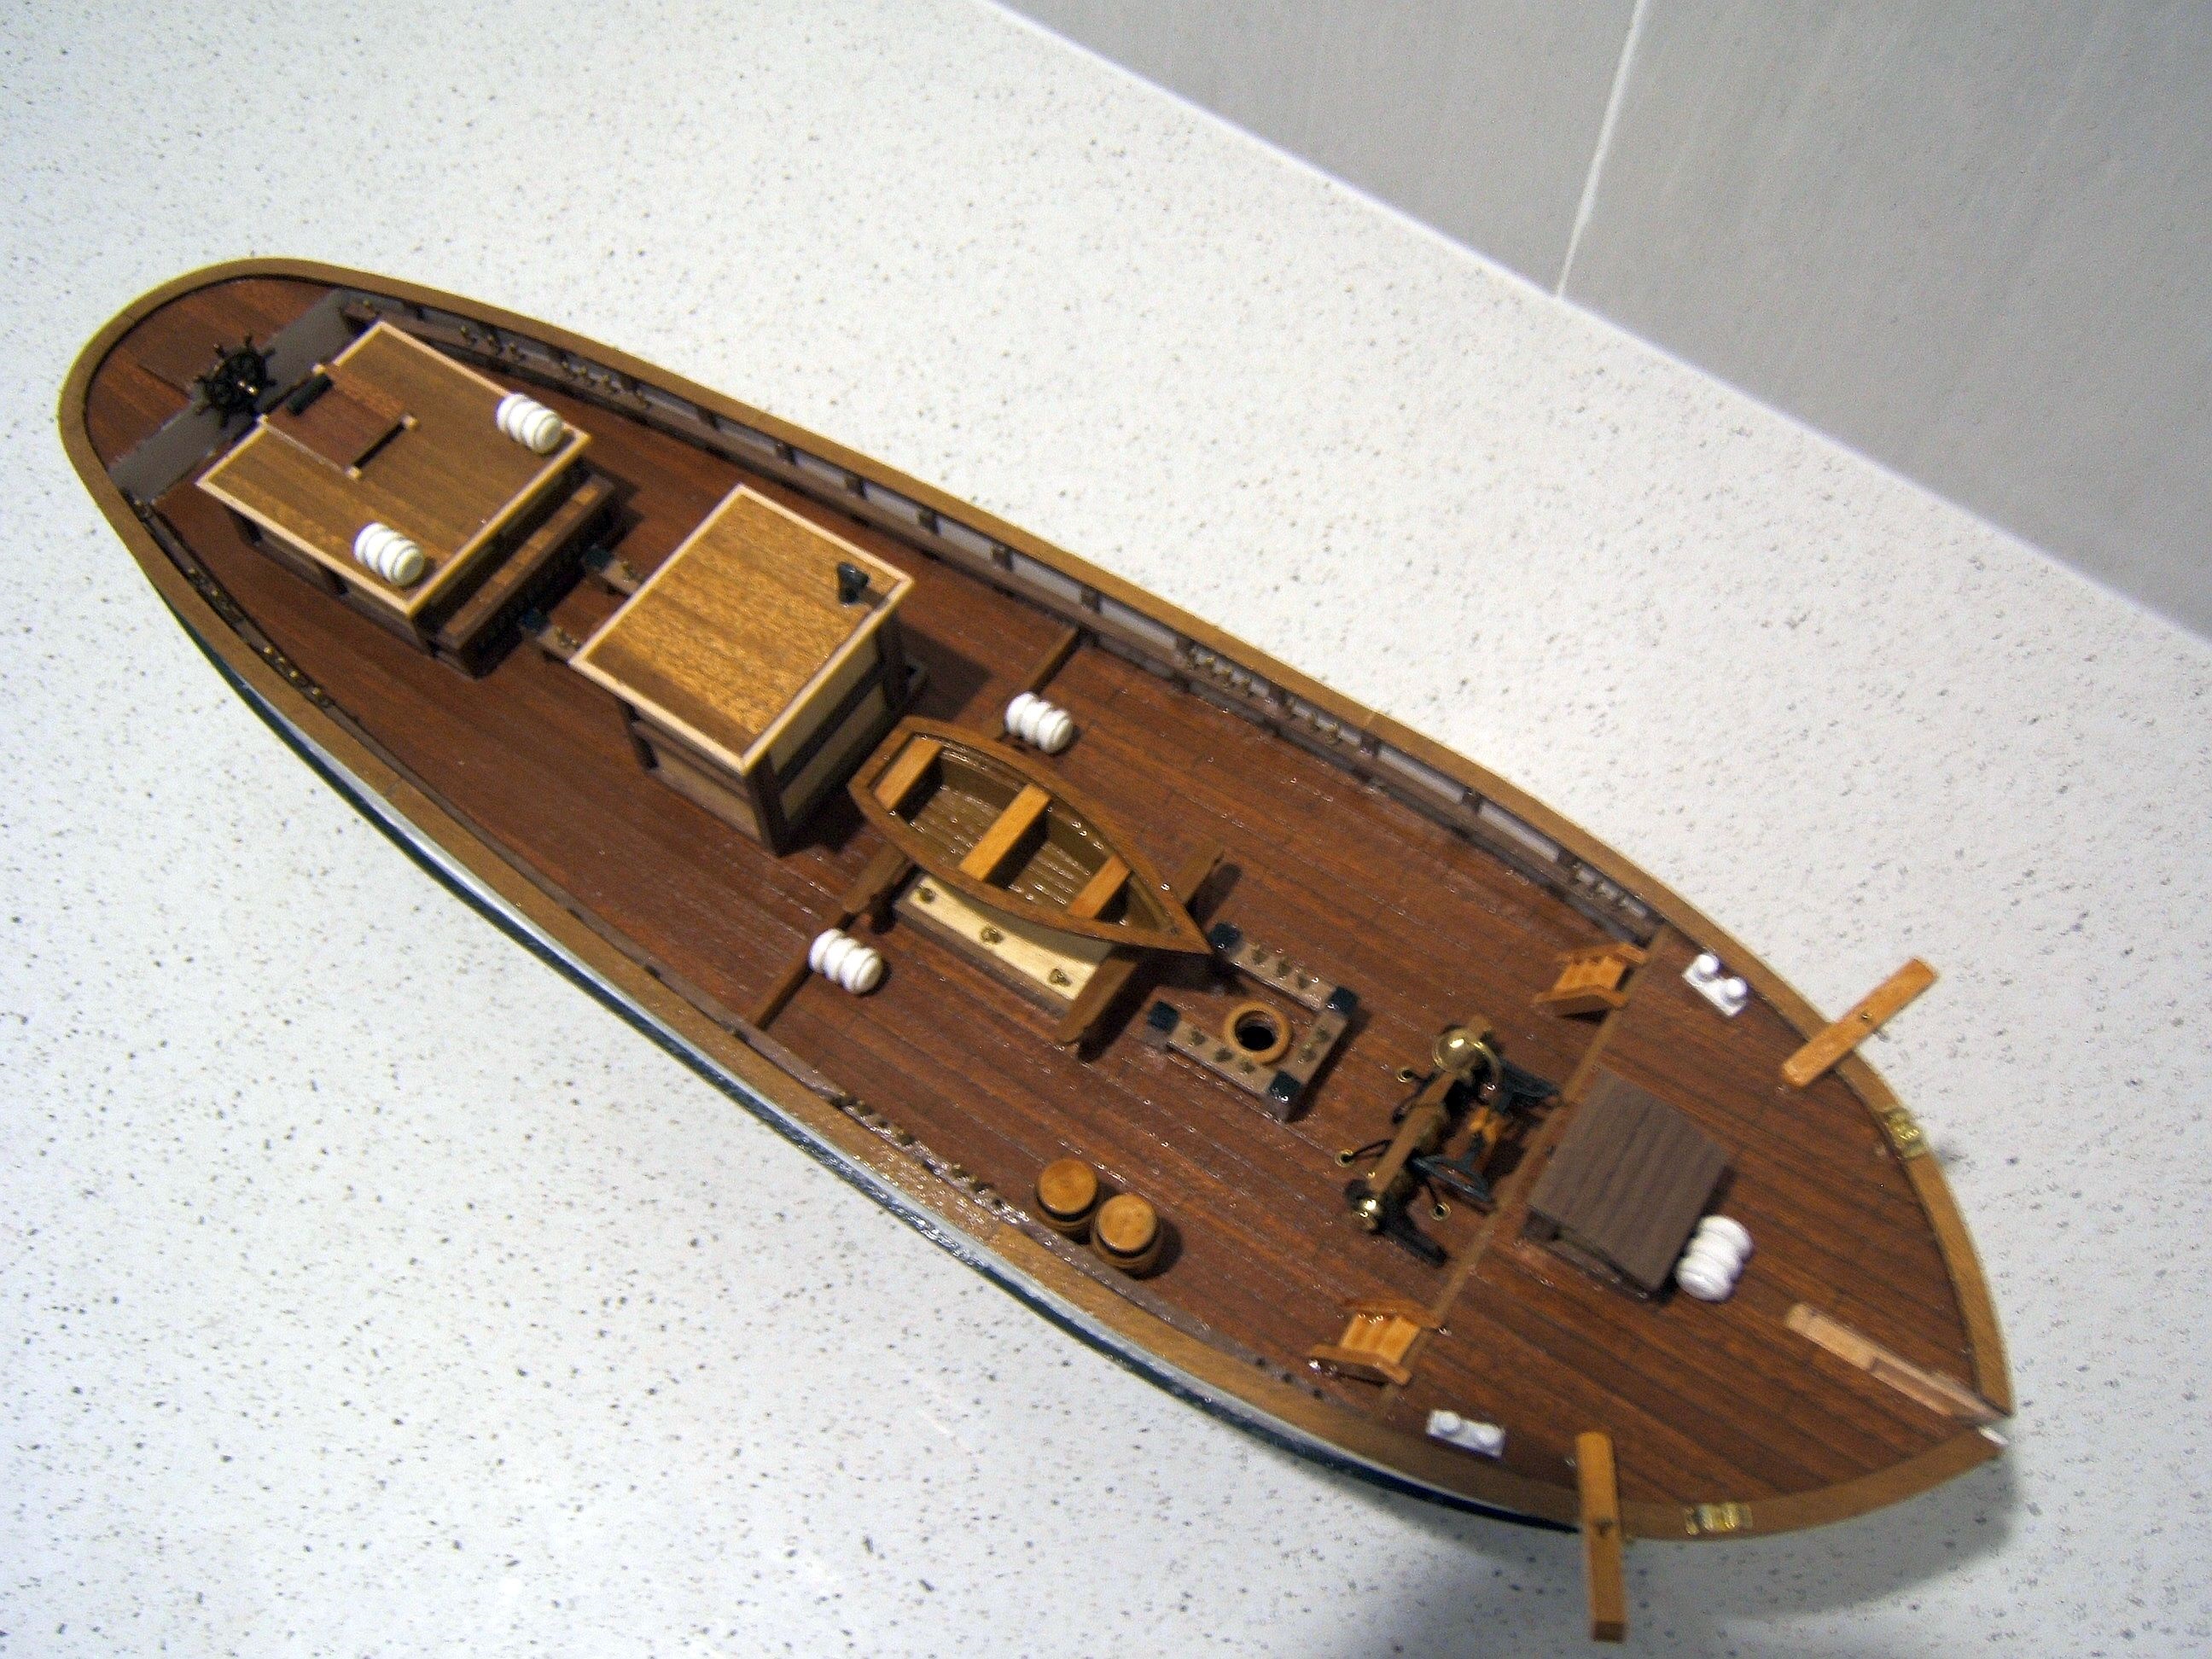
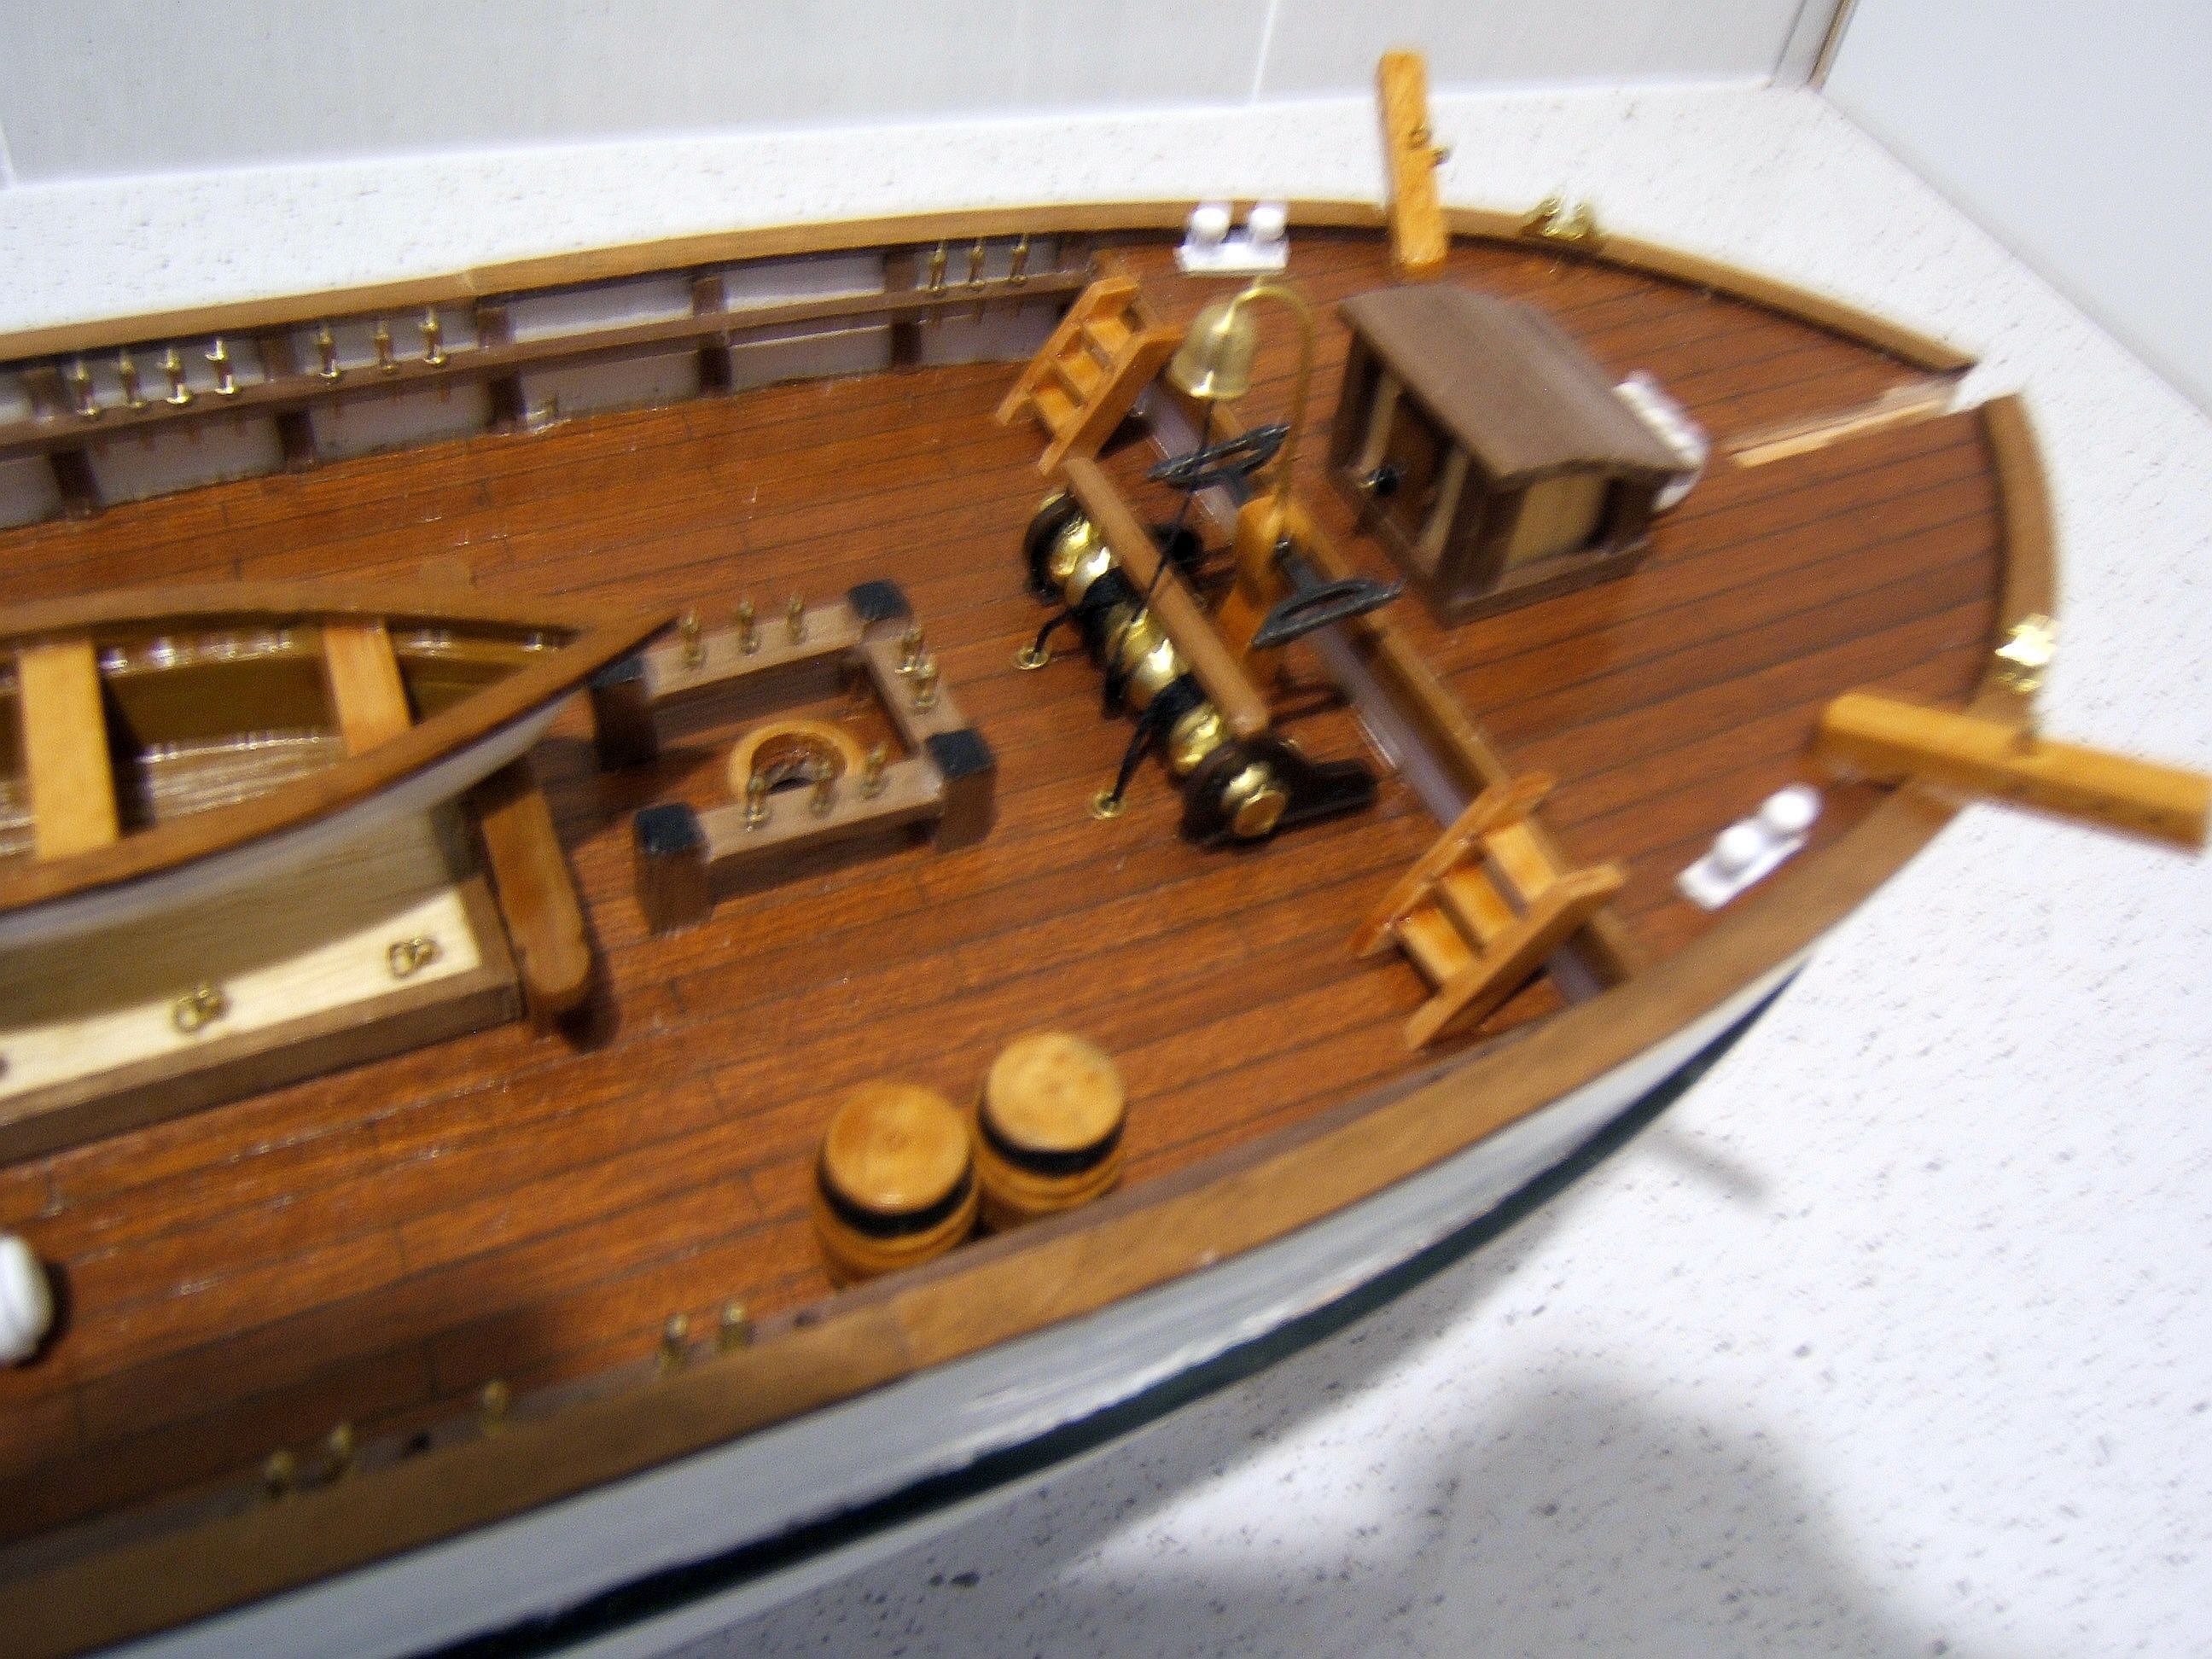
Here we see the deck fittings in place but without lashings etc yet to come. The deck housing was laser cut in fine plywood but all the surrounds of base, windows and roofing were handcut which included a total of 50 mitre joints! The model is small and the tasks are minute but very time consuming with patience and utmost care.
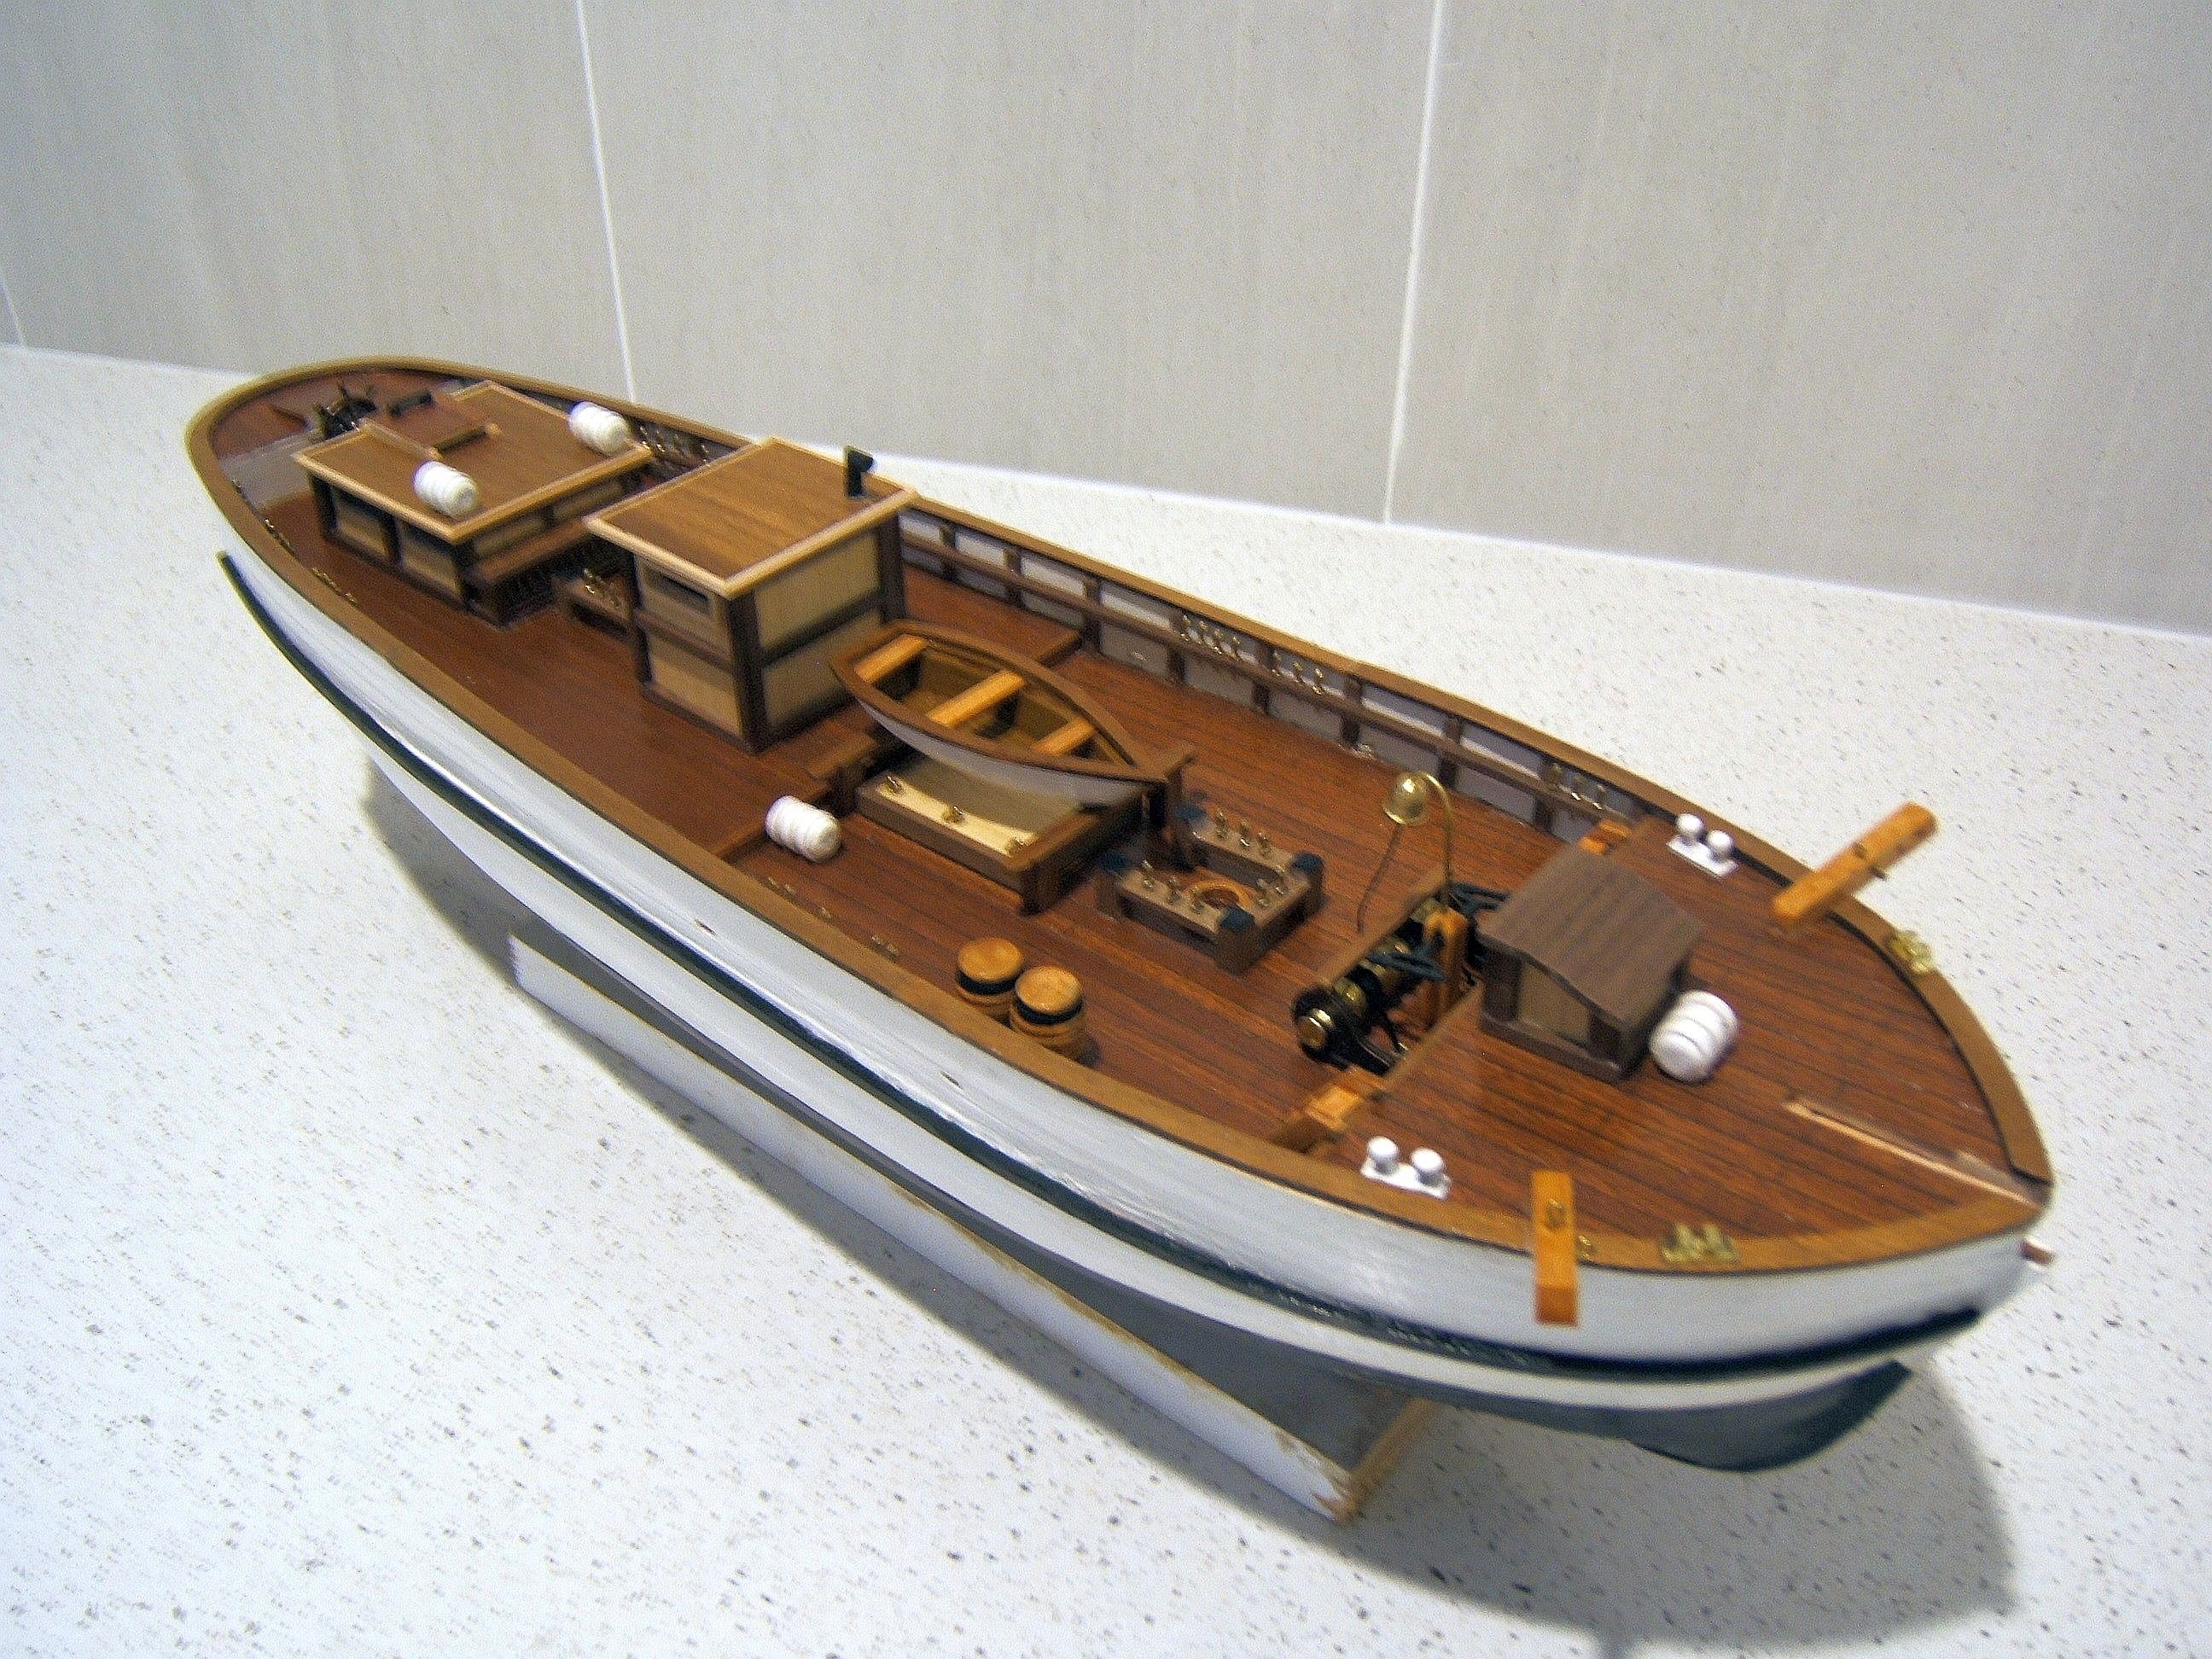
Another view of the deck fittings for perhaps more clarity. Note there are 5 inflatable rafts in the white circular containers placed forrard, midships and on the after deck house. There is a bell sighted forrard of the windlass but protected by the bow companionway. The bell is fitted with a lengthy 'clanger rope'. Two barrels are secured to the to the deck alongside the bulwarks forrard, three buckets are secured alongside the midship deckhouse and the lifeboat secured on two supporting timbers above the hatchway. The ships wheel is on the bulkhead of the poop deck.
A closer look at the bow fittings as described above. The anchor davits are in place and a better view is shown of the windlass, bell and the drain pump.

A closer look at the stern section. It shows the unusual position of the wheel, the inflatables on the roof of the deck house and the unique sliding roof giving access to the accommodation aft.

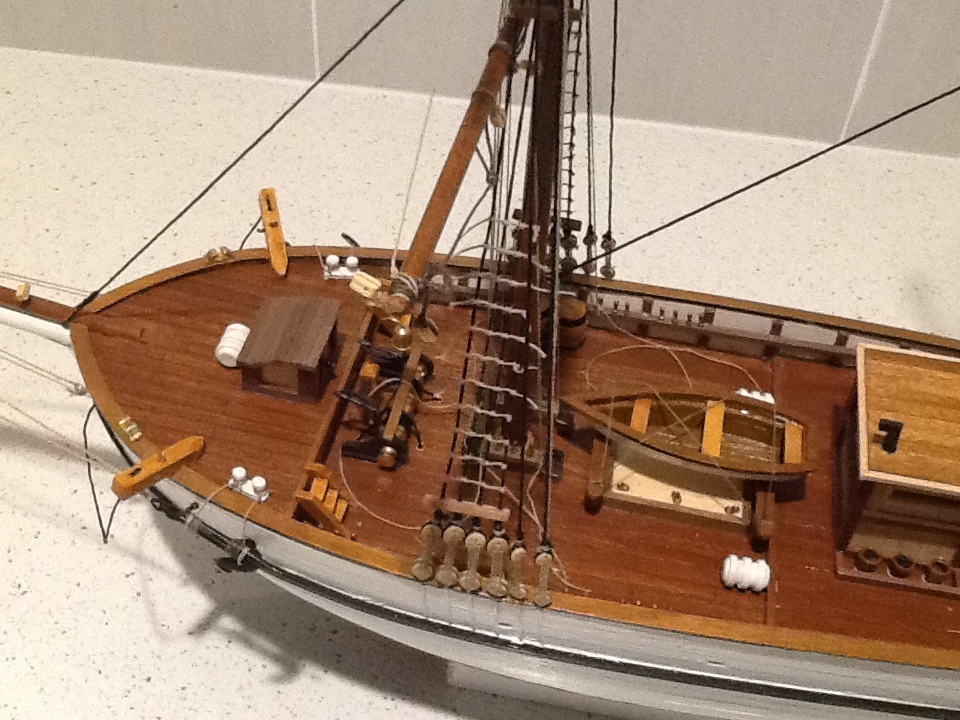
Here we see the two masts, the bowsprit, and the yards etc fitted in place with the bowsprit secured with initial rigging. Next we fit the standing rigging to to support the masts followed by the ratlines on both the main and foremasts. As the latter is a painstaking task, it is advised best to do them in stages as they do require great care and concentration. My personal problem, in these advancing years, is to control my fingers when tying the numerous knots. The eyes need a rest too so it's wise to do a few odd jobs between times!
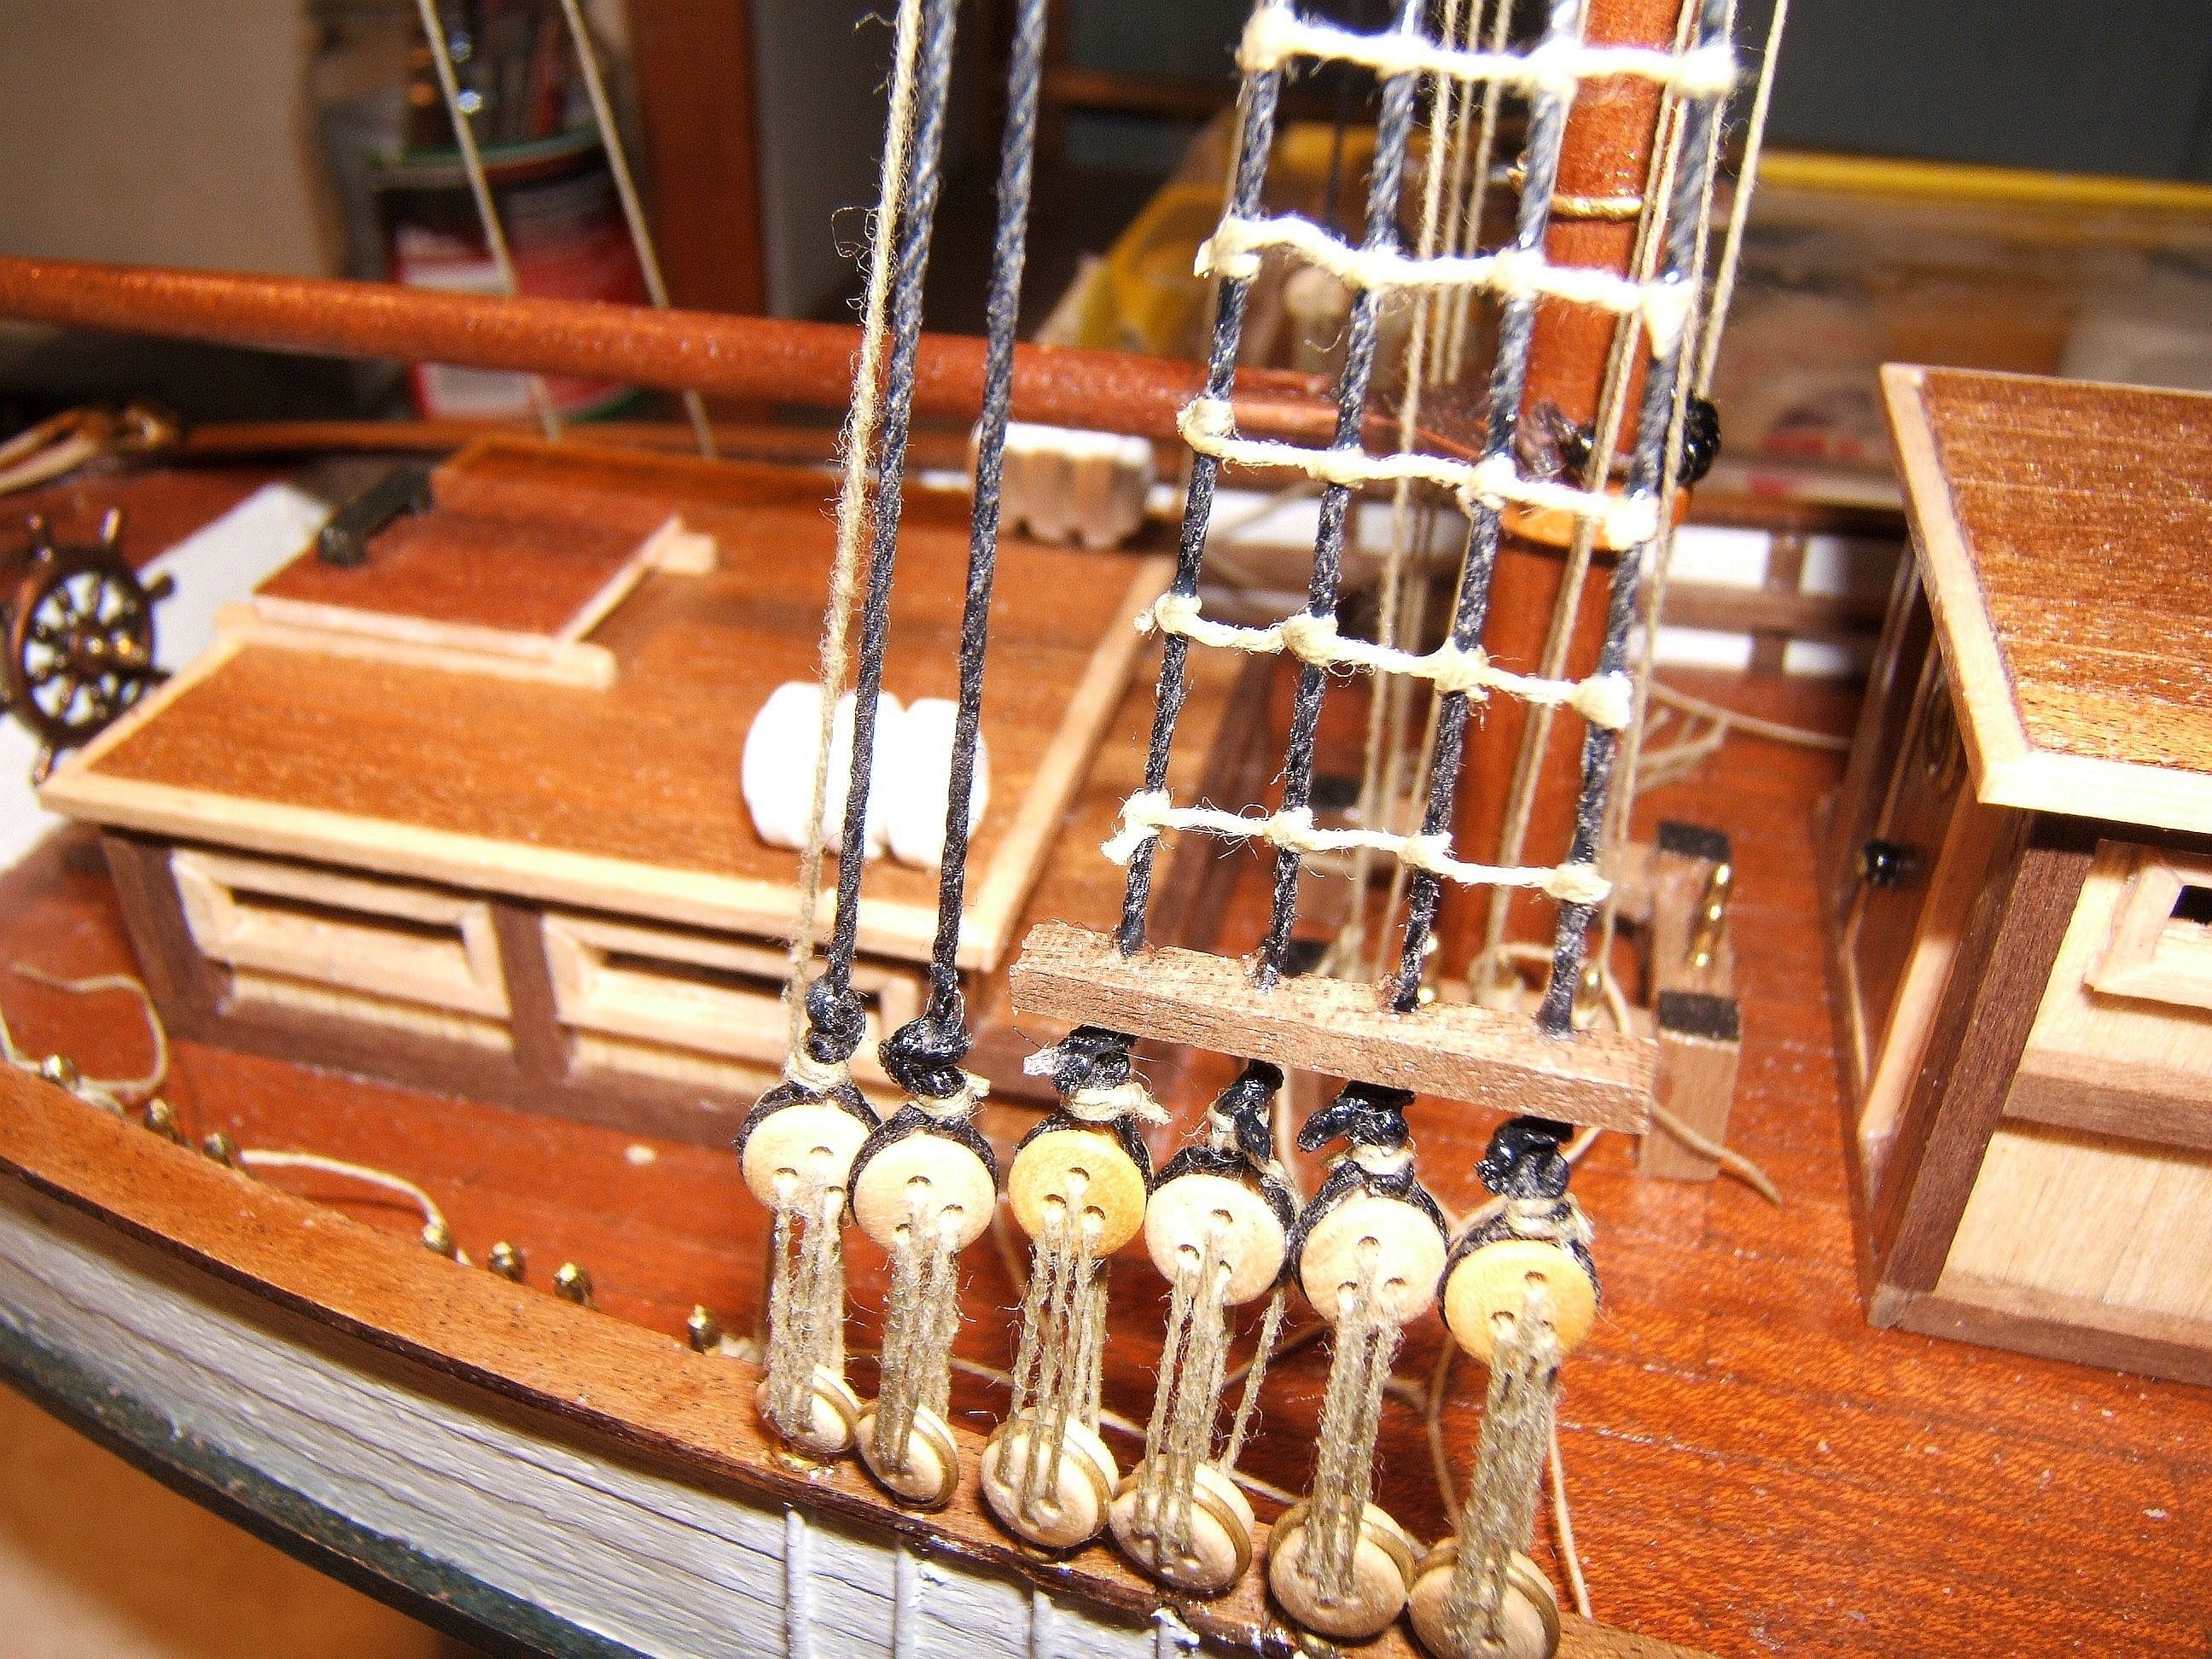
Here are the ratlines under construction. Most modellers like to have them very uniform a taught. However, in real life, they have to bear the weight of the crew members scaling them consistently so will always be 'sagging'! It's all a matter of choice.
Normally I would not fit the masts before applying the ratlines. However, the instructions indicated I should and therefore, I obeyed. It was not a good idea as the ratlines need as much space as possible around them for the reasons described previously. This photo shows what I mean. It also highlights the need to always leave yourself plenty of extra length in the cotton and, before you trim the loose ends, give the completed ratline a touch of adhesive on the knots. Also note the rigging secured to the belaying pins has the addional length lying on the deck awaiting coiling.
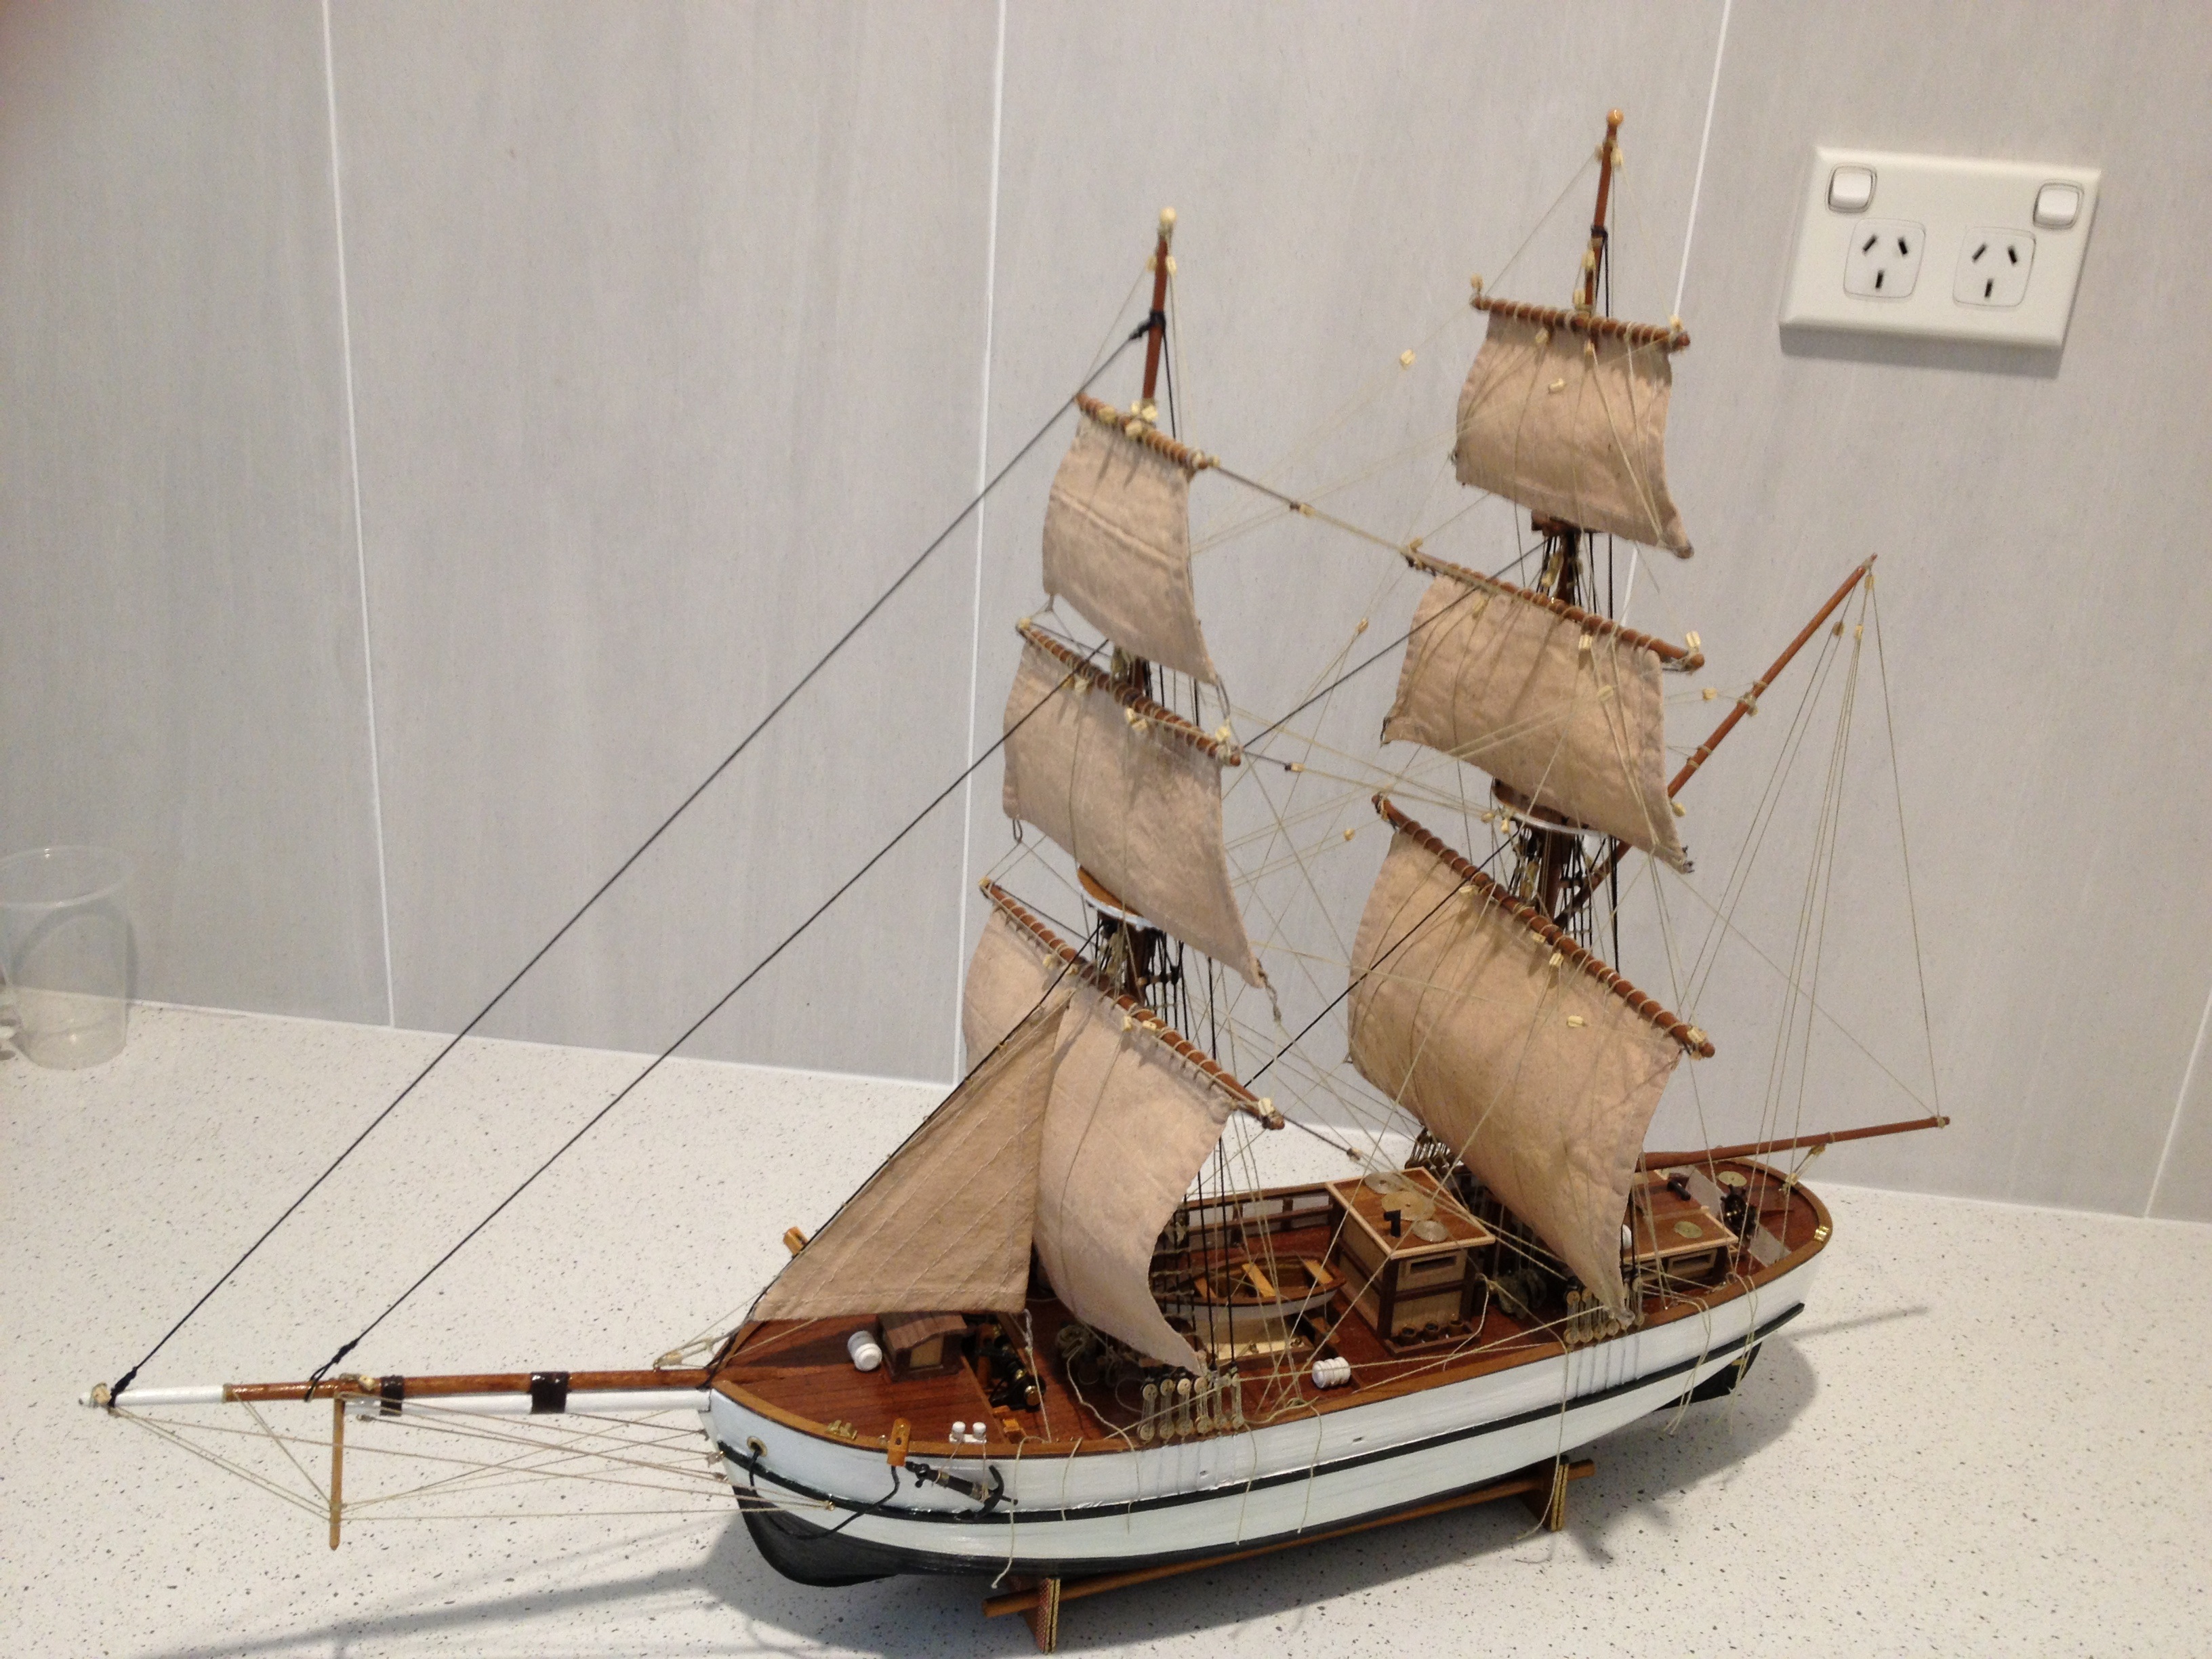
Having completed the rigging the vessel looked as though it needed something extra. Contrary to my preferred position, I trialled a sail or two in temporary place and decided it would be better to add them permanently. All advice received was to warn me against attaching sails after all the other rigging was secured. It was extremely difficult and tested my patience but the attached photo shows progress to date. Just a few more fore and aft sails to complete, followed by substantial 'tidying up'. The lesson to be learned is to attach the sails to the yards 'early in the piece!"

At long last the Aurora is complete and now awaits the base plate and the perspex casing. It was not a good idea to afix the sails so late in the construction phase as mentioned above. It did require considerable re-rigging of previously completed rigging and then a lot of re-tensioning afterwards before a satisfactory result was achieved. In regard to the sails, I think I would prefer to make our own rather than have them pre-made and supplied in the kit.
Now we have to decide which is the next model to tackle so watch my website for the next chapter.
Updated 7.8.2017